Pinhole lenses can be a lot of fun and are really easy and inexpensive to make.
What you will need:
1. Black Paper
2. a small sewing needle, the smaller the better
3. scissors
4. Tape
5. a pencil or pen
6. wiskey
I'm just kidding about the wisky.LOL


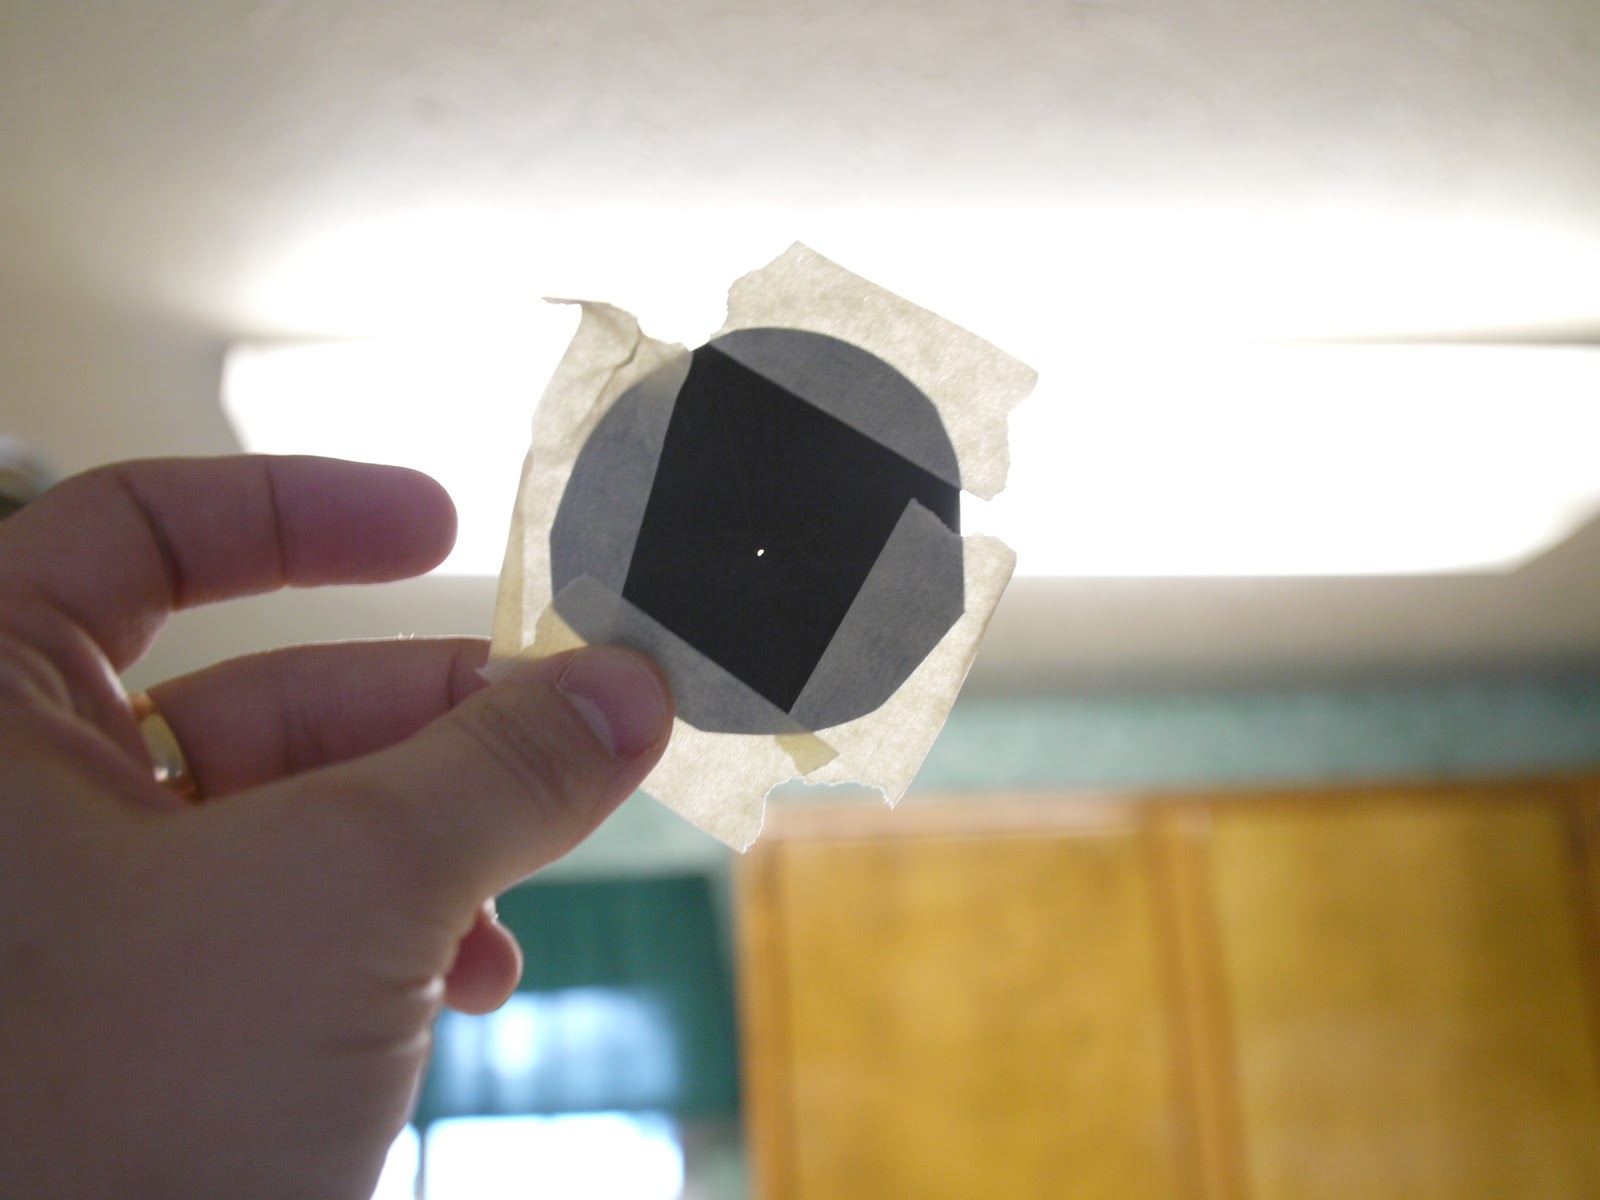
What you want to do is to take your lens cap, or a lens and place it on the black paper and trace around it making a circle.
Then cut out the circle. Take the sewing needle and in the center of the paper circle, make the smallest hole you can.
The hole will determine how focused your photo will be. The smaller the hole, the sharper the focus. Take the lens off your camera and tape the
paper circle over the opening on your camera. Thats it! Your done!! Now you are ready to shoot. When shooting you will either have to shoot in
manual exposure mode or in shutter priority. On certian digital cameras you will need to set the camera to shoot without a lens, but most will
allow you to shoot away without a menu change.
If you are not happy with your first pinhole lens, try again. It took me several times before I got one I like.
If you want to be more serious and go the extra mile, use a aluminum soda can. Cut a square piece(about 1 inch by 1 inch) and then poke a hole with the
needle in the center. Use sanding paper, sand the back side of the aluminum. Then cut out a circle on black paper(the size of the opening on your
camera) and cut a small hole in the middle of the black paper. Tape the aluminum in the center of the back paper and pow! You have a pinhole lens.
You can also use a lens cap instead of paper if you want to. Just drill a hole in the cap and tape the aluminum over the hole and your done!
You can also buy pinhole lenses on the web. Search ebay!
Tell us how your pinhole lens turns out, post a comment and let us know!
Thanks for reading!!!!
Here are a few photo I took with the lens above!


No comments:
Post a Comment